Configure your kubernetes with helm chart
I am a Software Engineer. I have worked with different languages like NodeJS and Python. I have keen interest in Backend Engineering, Cloud Native Technologies and System Architecture.
What is helm?
Helm is a package manager for Kubernetes. It makes updates and rollback of applications more efficient and improves team collaboration.
Kubernetes objects are challenging to manage Helm automates maintenance of YAML manifests for Kubernetes objects by packaging information into charts and advertises them to a Kubernetes cluster.
Helm keeps track of the versioned history of every chart installation and change. Rolling back to a previous version or upgrading to a newer version is completed with comprehensible commands.
What is helm chart?
Helm charts are Helm packages consisting of YAML files and templates which convert into Kubernetes manifest files. Charts are reusable by anyone in any environment, which reduces complexity and duplicates.
Install helm in ubuntu
Prerequisites:
Before Installing the helm package manager, please make sure you already have a Kubernetes cluster running in your system i.e., minikube is already installed and running on your system.
You can follow this link for setting up kubernetes in your local -https://techblog.akashojha.com/setup-and-run-your-app-on-kubernetes-locally-in-your-system
Let's install helm in your system.
Run these commands in your terminal
curl -fsSL -o get_helm.sh https://raw.githubusercontent.com/helm/helm/main/scripts/get-helm-3
chmod 700 get_helm.sh
./get_helm.sh
Now helm package manager should be installed. We can confirm this by running the following command
helm version
You can see this in the output
version.BuildInfo{Version:"v3.10.3", GitCommit:"835b7334cfe2e5e27870ab3ed4135f136eecc704", GitTreeState:"clean", GoVersion:"go1.18.9"}
Understand the Helm Chart files
Let's create the first helm chart.
By just running a simple command in your system, you should be able to create your first helm chart.
helm create first-chart
Your file structure will look like this.
|-- Chart.yaml
|-- charts
|-- templates
|   |-- NOTES.txt
|   |-- _helpers.tpl
|   |-- deployment.yaml
|   |-- hpa.yaml
|   |-- ingress.yaml
|   |-- service.yaml
|   |-- serviceaccount.yaml
|   `-- tests
|       `-- test-connection.yaml
`-- values.yaml
The files and folders mentioned above have some specific responsibilities to perform
File/ Folder | Responsibilities |
templates/ | The |
values.yaml | The |
Chart.yaml | The |
charts/ | The |
helpers.tpl | Files whose name begins with an underscore ( |
Most files in templates/ are treated as if they contain Kubernetes manifests except
Let's go over some of the functionalities of helm charts. First we need to delete all the files under templates/ directory.
Let's create a file called configmap.yaml in templates/ directory and add the following content into it.
apiVersion: v1
kind: ConfigMap
metadata:
  name: {{ .Release.Name }}-{{ include "app.name" .}}-configmap
data:
  myvalue: "Hello World"
  drink: {{ .Values.favoriteDrink }}
Objects: Objects are passed into a template from the template engine and your code can pass objects around. The Release object contains several objects (like Release.Name, Release.Namespace) .In the above example, {{ .Release.Name }} will insert the name of a release into a template.
Values: Values are passed into the template from the values.yaml file and from user-supplied files.
Let's clear our values.yaml file and add the following into it.
favoriteDrink: coffee
Let's add the following to the templates/_helpers.tpl file.
{{- define "app.name" -}}
{{- .Release.Namespace | trimSuffix "-" }}
{{- end }}
Now if we run the command
helm install --debug --dry-run first-app-test ./first-chart
We can see the following in the output
# Source: first-chart/templates/configmap.yaml
apiVersion: v1
kind: ConfigMap
metadata:
  name: first-app-test-default-configmap
data:
  myvalue: "Hello World"
  drink: coffee
So, the configmap.yaml file will get the .Release.Name from the command line . The app.name is defined in _heplers.tpl file. The include function will include that inside the configmap.yaml file.
We can shift the myvalue: "Hello World" from config map to _helpers.tpl file.
{{- define "app.name" -}}
{{- .Release.Namespace | trimSuffix "-" }}
{{- end }}

{{- define "app.values" -}}
myvalue: "Hello World"
{{- end }}
And Let's modify our configmap.yaml file. nindent 2 will add 2 spaces before including the content.
apiVersion: v1
kind: ConfigMap
metadata:
  name: {{ .Release.Name }}-{{- include "app.name" .}}-configmap
data:
  {{- include "app.values" . | nindent 2}}
  drink: {{ .Values.favoriteDrink }}
Now Lets's run the same command
helm install --debug --dry-run first-app-test ./first-chart
We can see the output will not change.
# Source: first-chart/templates/configmap.yaml
apiVersion: v1
kind: ConfigMap
metadata:
  name: first-app-test-default-configmap
data:
  myvalue: "Hello World"
  drink: coffee
Install a helm chart
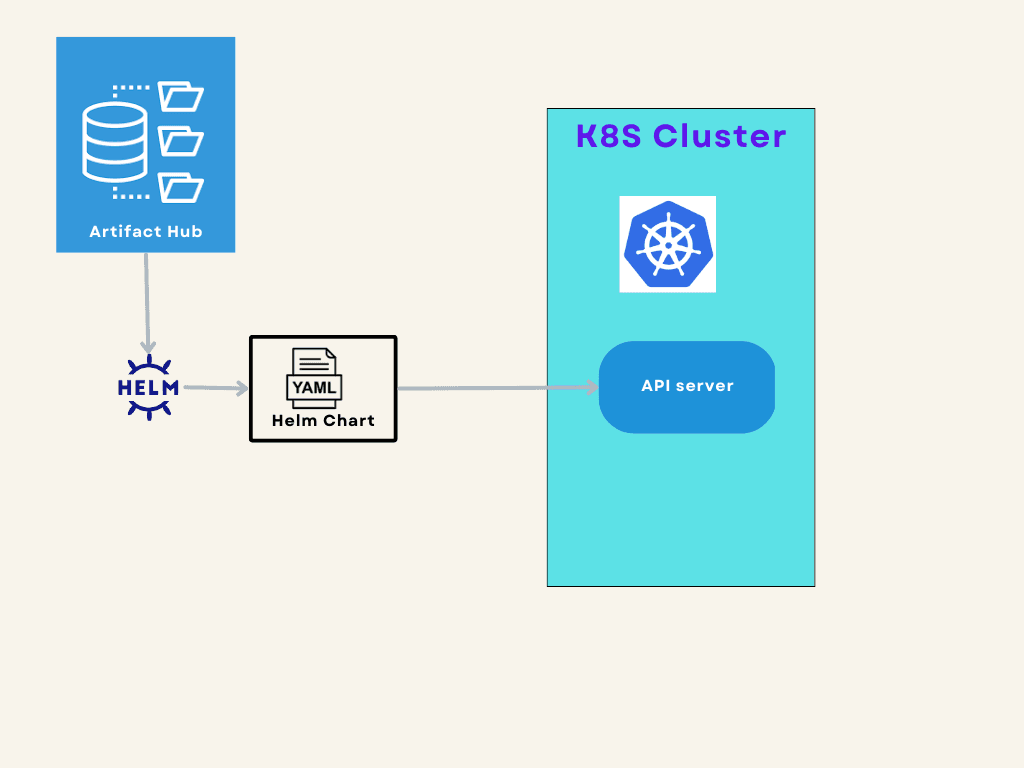
helm search hubsearches the Artifact Hub, which lists helm charts from dozens of different repositories.helm search reposearches the repositories that you have added to your local helm client (withhelm repo add). This search is done over local data, and no public network connection is needed.
By running the following command
helm search hub nginx
We can get all helm chart repositories for nginx in Artifact Hub
URL                                                   CHART VERSION    APP VERSION                  DESCRIPTION
https://artifacthub.io/packages/helm/bitnami/nginx    13.2.21          1.23.3                       NGINX Open Source is a web server that can be a...
https://artifacthub.io/packages/helm/mirantis/n...    0.1.0            1.16.0                       A NGINX Docker Community based Helm chart for K...
https://artifacthub.io/packages/helm/dysnix/nginx     7.1.8            1.19.4                       Chart for the nginx server
https://artifacthub.io/packages/helm/test-nginx...    0.1.0            1.16.0                       A Helm chart for Kubernetes
Let's add bitnami to our local repositories
helm repo add bitnami https://charts.bitnami.com/bitnami
Let's install the bitnami nginx chart in our local
helm install nginx-release bitnami/nginx
You can see the helm chart is installed and running in your kubernetes cluster by running the command
helm list
If you want to see your app in your browser you can get the minikube-ip.
minikube ip
For me the output is
192.168.58.2
And you can get your port from the following command
kubectl get svc --namespace default -w nginx-release
For me, the output is
nginx-release LoadBalancer 10.102.32.132 <pending> 80:31600/TCP 24m
I can visit the following address in my browser to get the default page of nginx - http://<minikube-ip>:<service-port> (For me, http://192.168.58.2:31600/)
You can uninstall the helm chart by running the command
helm uninstall nginx-release
Conclusion
I hope you get a basic understanding of helm. And you'll be able to implement helm for your next Kubernetes deployment. The helm community has a very well written doc. You should visit the official documentation of helm and explore more - https://helm.sh/docs/
Happy Learning !!