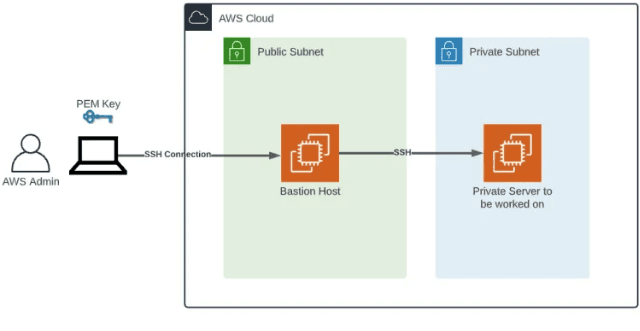
How to create a simple Bastion server in AWS
I am a Software Engineer. I have worked with different languages like NodeJS and Python. I have keen interest in Backend Engineering, Cloud Native Technologies and System Architecture.
What is a Bastion host?
A bastion host is a server whose purpose is to provide access to a private network from an external network, such as the Internet. Because of its exposure to potential attack, a bastion host must minimize the chances of penetration. The computer generally hosts a single application or process, for example, a proxy server or load balancer, and all other services are removed or limited to reduce the threat to the computer.
Let's get started with our bastion server configuration.
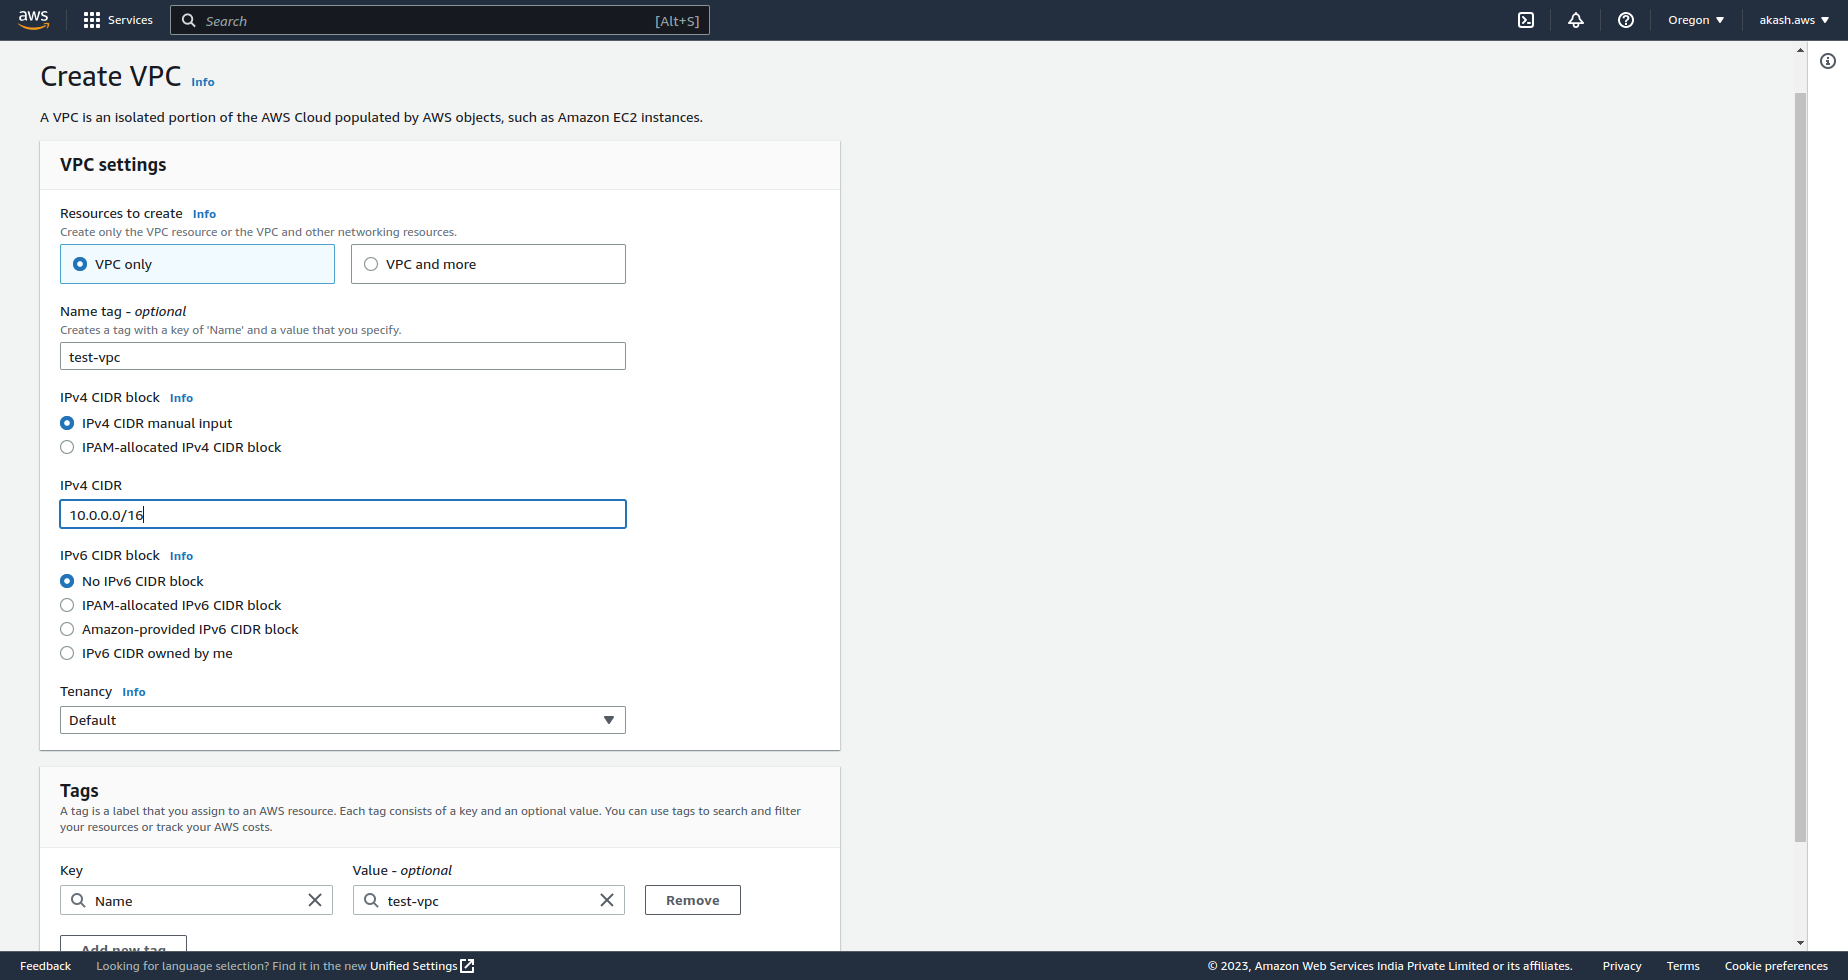
Create a VPC
Amazon VPC enables you to launch AWS resources into a virtual network that you've defined. This virtual network closely resembles a traditional network that you'd operate in your own data center, with the benefits of using the scalable infrastructure of AWS.
Creating a VPC on AWS is very simple. You can go to the VPC management console on AWS and select the name of your choice for it. Then you need to add your IPV4 CIDR to your network. The minimum subnet mask allowed in AWS is 16(255.255.0.0). We will be adding our CIDR as 10.0.0.0/16. So, a total of 65536(10.0.0.0 -10.0.255.255) IP addresses are allocated to your VPC.
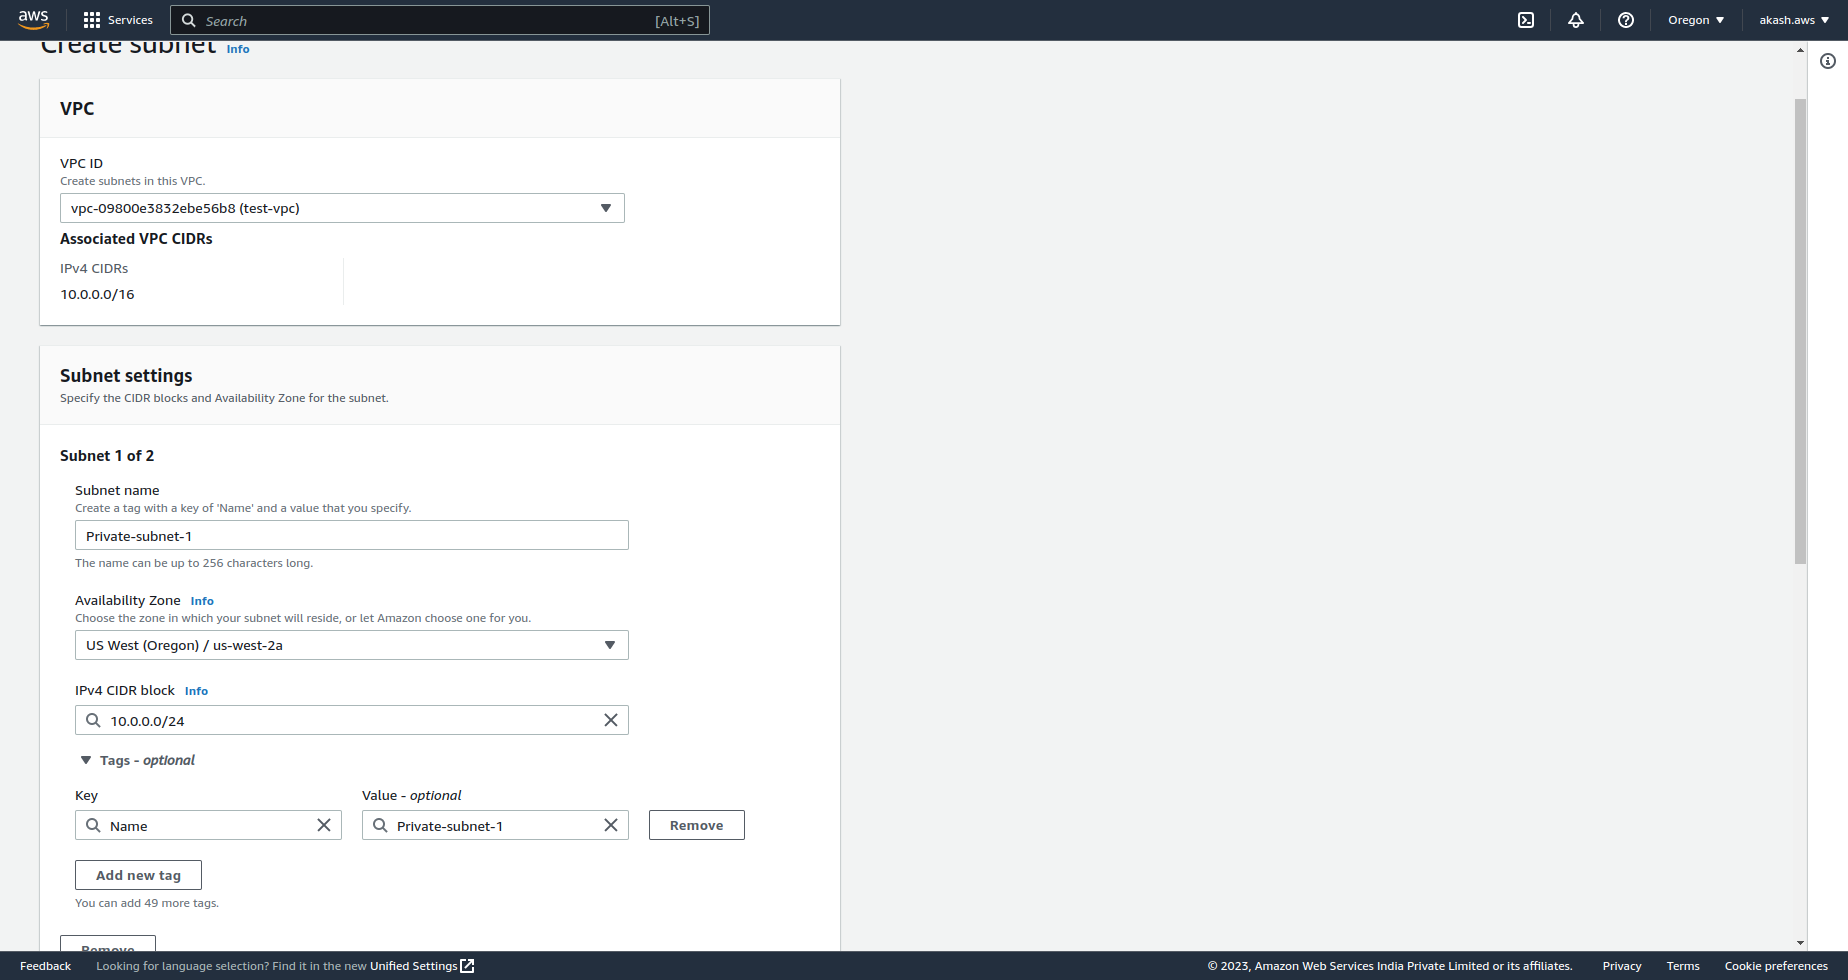
Creating Subnets against your VPC
A subnet is a range of IP addresses in your VPC. You can launch AWS resources, such as EC2 instances, into a specific subnet. When you create a subnet, you specify the IPv4 CIDR block for the subnet, which is a subset of the VPC CIDR block. Each subnet must reside entirely within one Availability Zone and cannot span zones. By launching instances in separate Availability Zones, you can protect your applications from the failure of a single zone.
Let's create 3 subnets with the following configurations
Name - Private-subnet-1, CIDR - 10.0.0.0/24
Name - Private-subnet-2, CIDR - 10.0.1.0/24
Name - Public-subnet-1, CIDR - 10.0.2.0/24
So, for the above configuration, each subnet has a total of 255 IP addresses allocated to it. As the name suggests, only the Pulic-subnet-1 can be accessed publicly and Private-subnet-1 and Private-subnet-2 will be private to the VPC network.
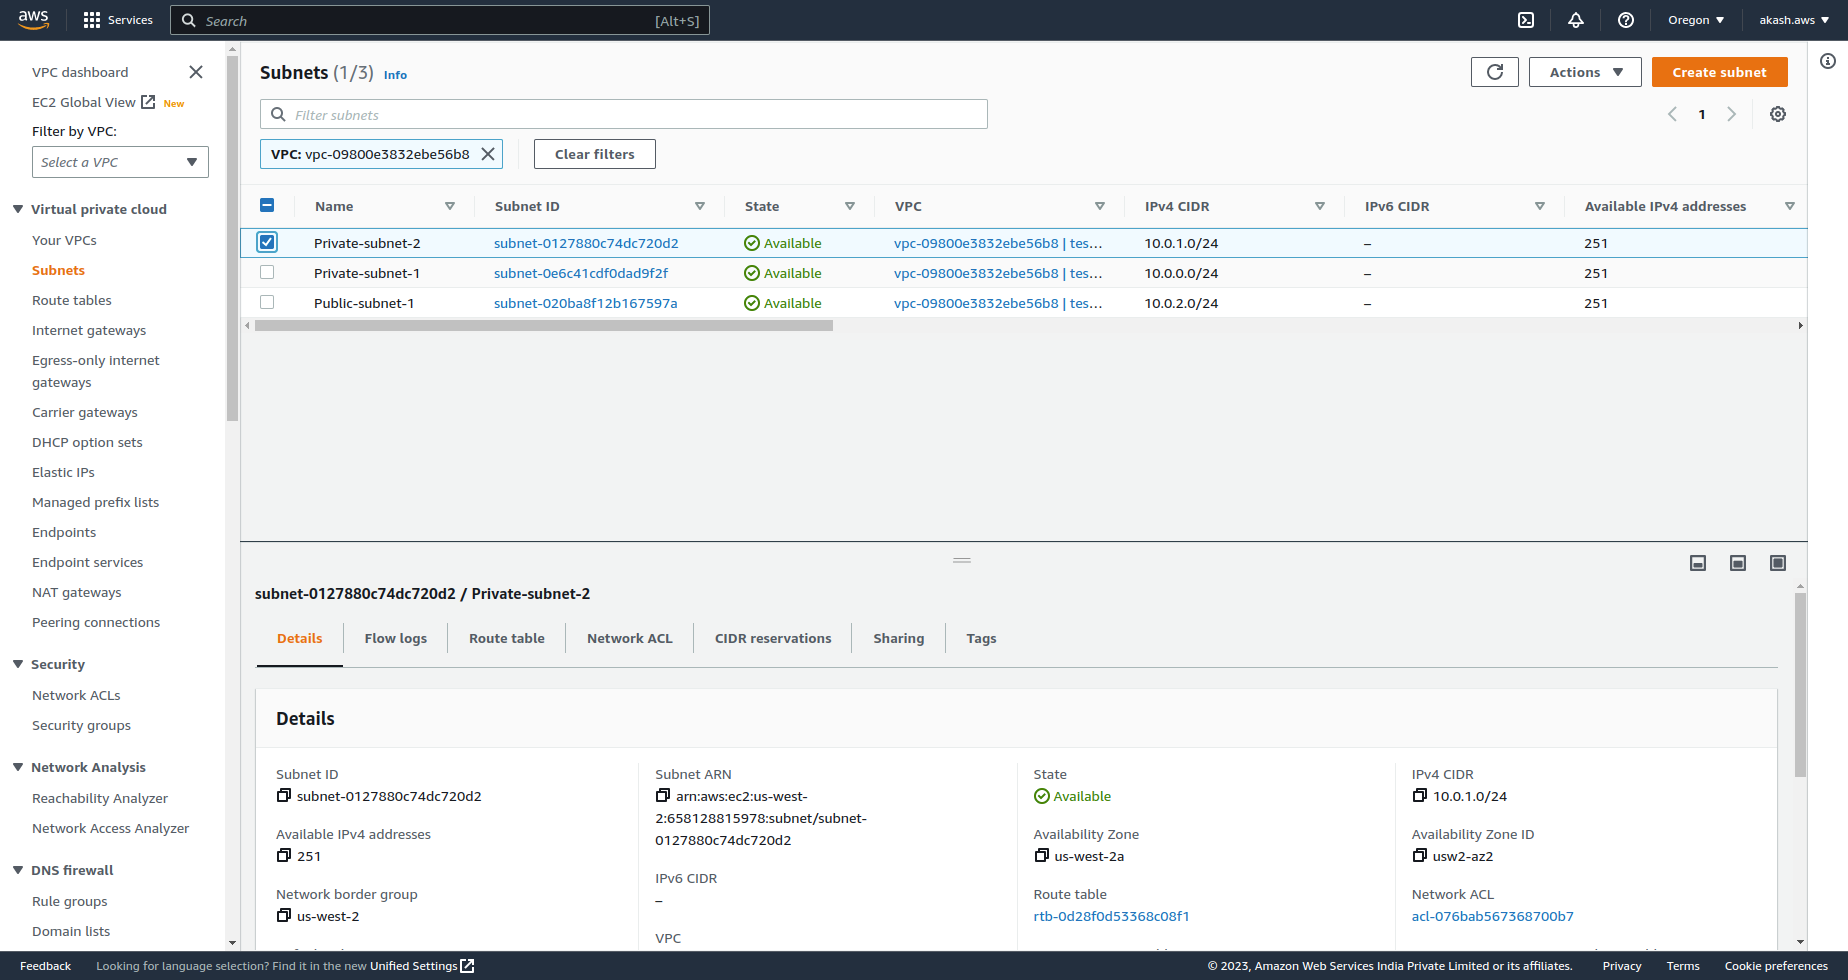
If you go to the subnet section under VPC in AWS you should see your subnet list. You can filter it by the VPC you created.
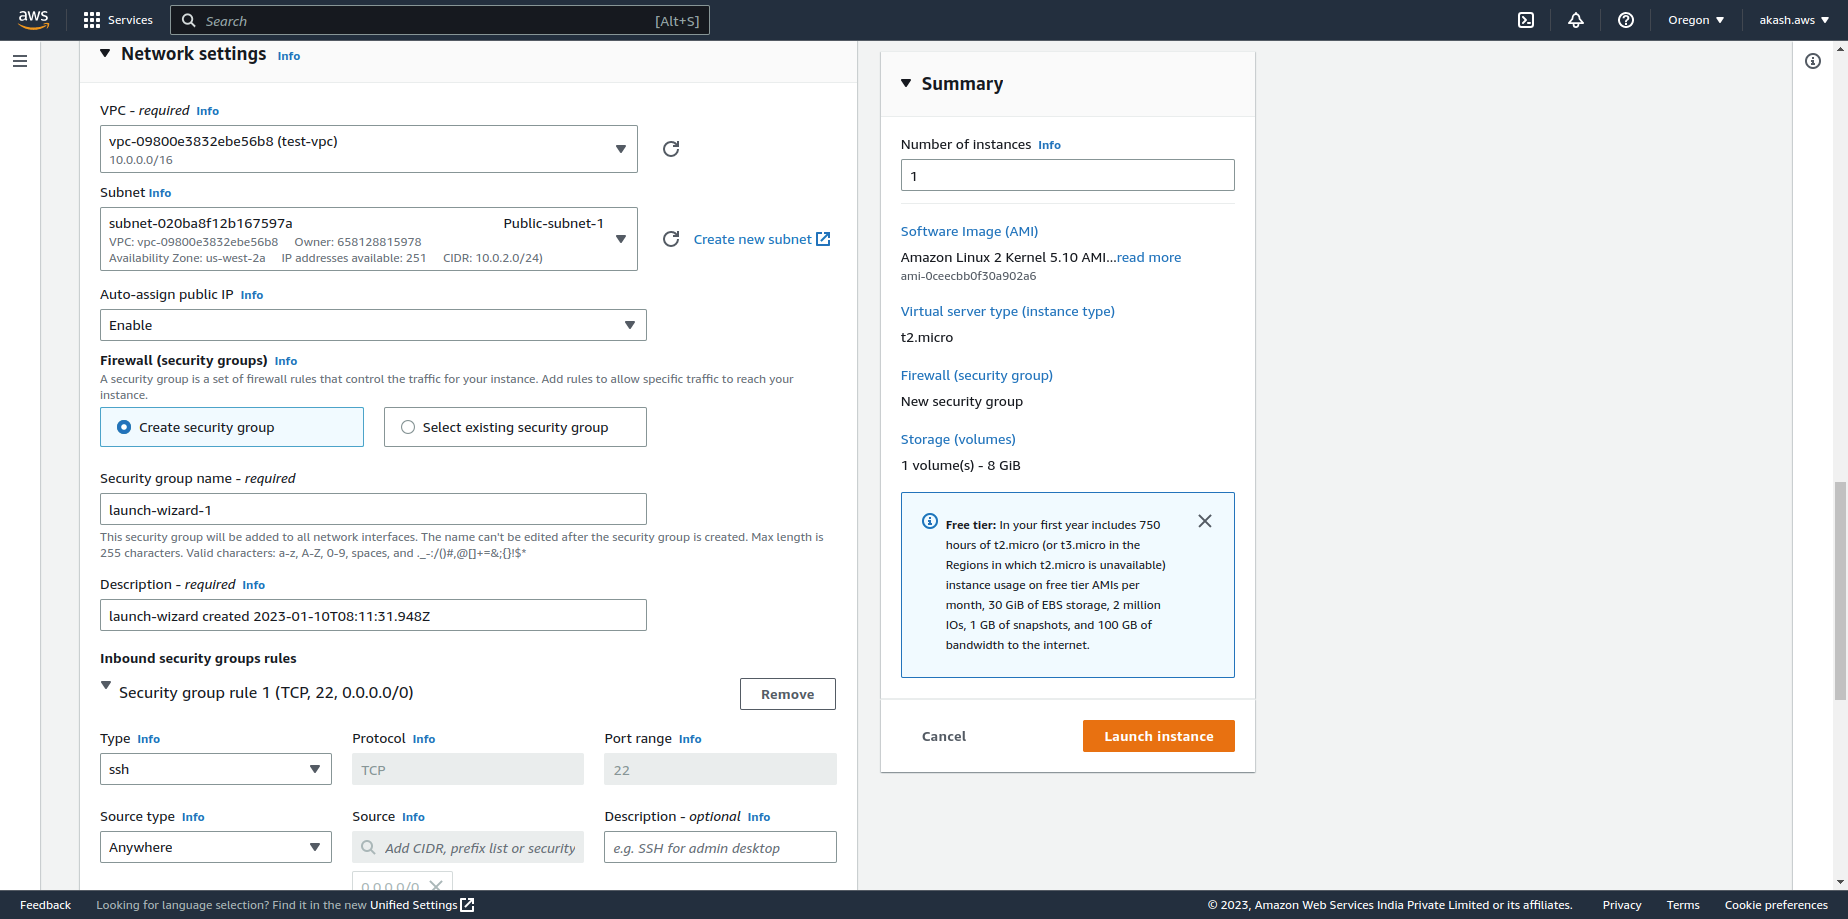
Launch EC2 instance against public subnet
Let's create an EC2 instance in Public-subnet-1 and give it external access like internet access.
At first, we need to launch an EC2 instance on the public subnet. To do so, we need to add the VPC and Subnet configuration correctly when launching the instance. Here is what my Network Settings look like when launching the instance.
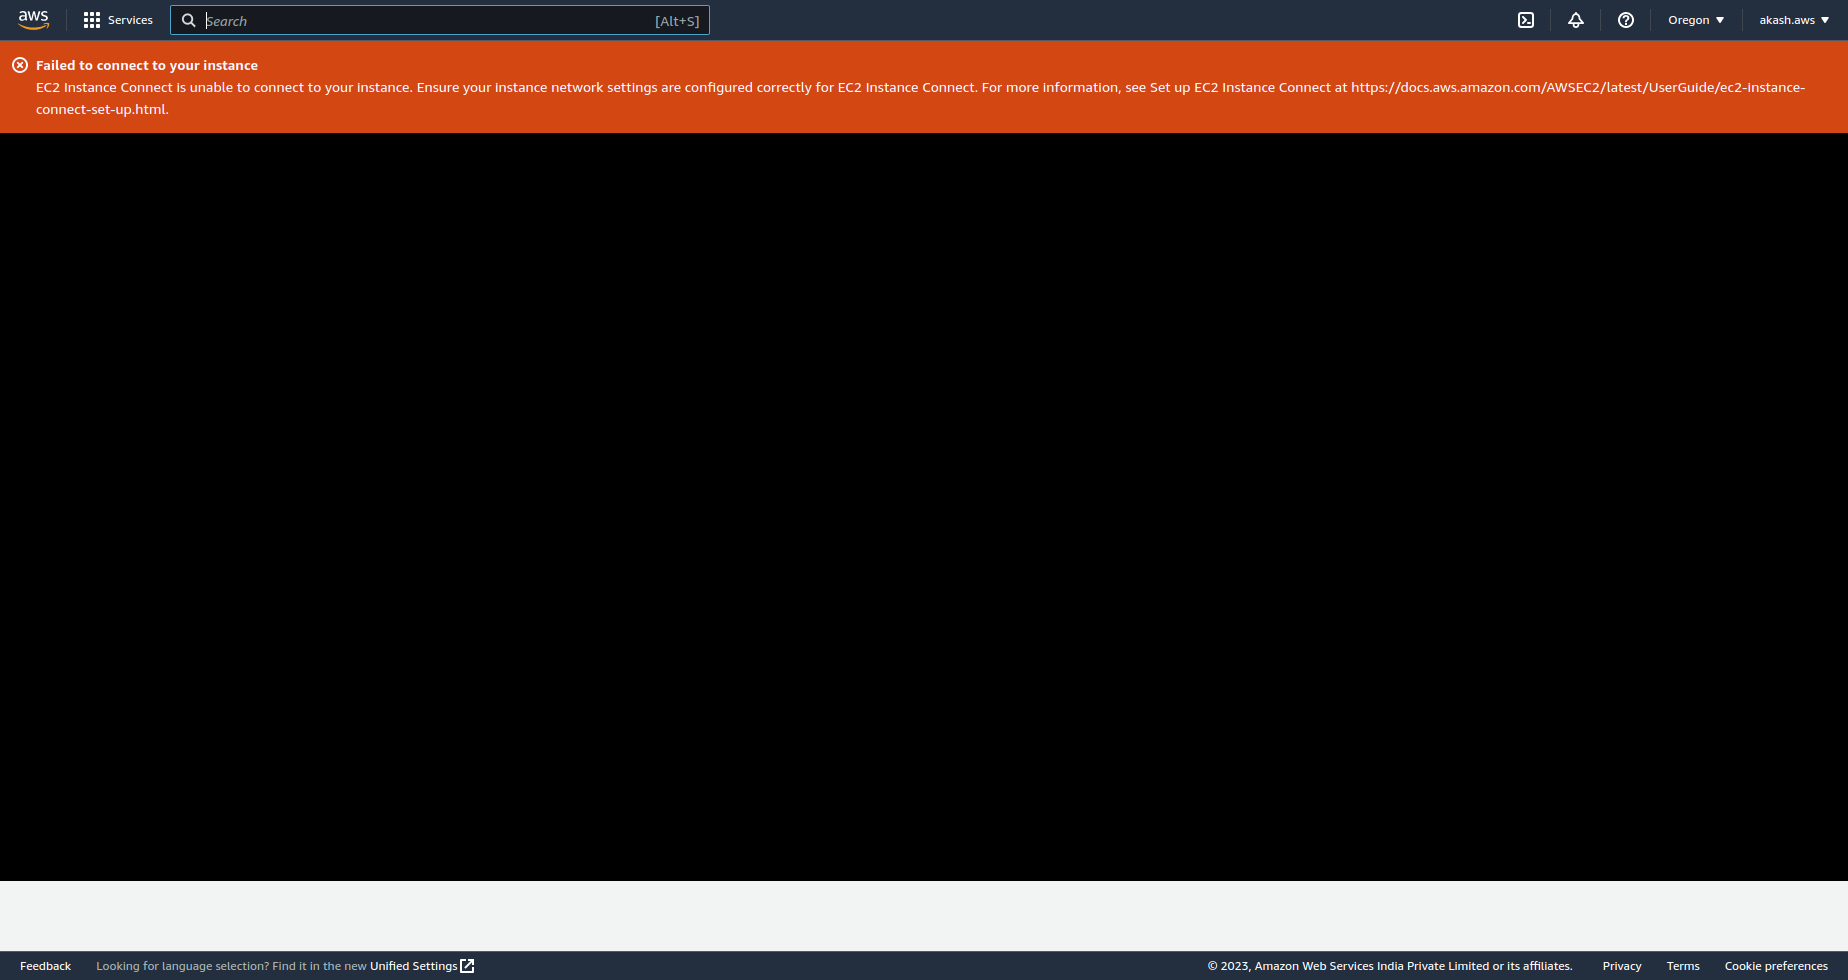
Now that you have launched the EC2 instance if you try to connect to your EC2 instance, you'll see an error - Failed to connect to your instance.
Create Internet Gateway and Route Tables
To access the EC2 instance from the outside we need to do the following.
An Internet gateway is a horizontally scaled, redundant, and highly available VPC component that allows communication between your VPC and the internet.
A route table contains a set of rules, called routes, that determine where network traffic from your subnet or gateway is directed.
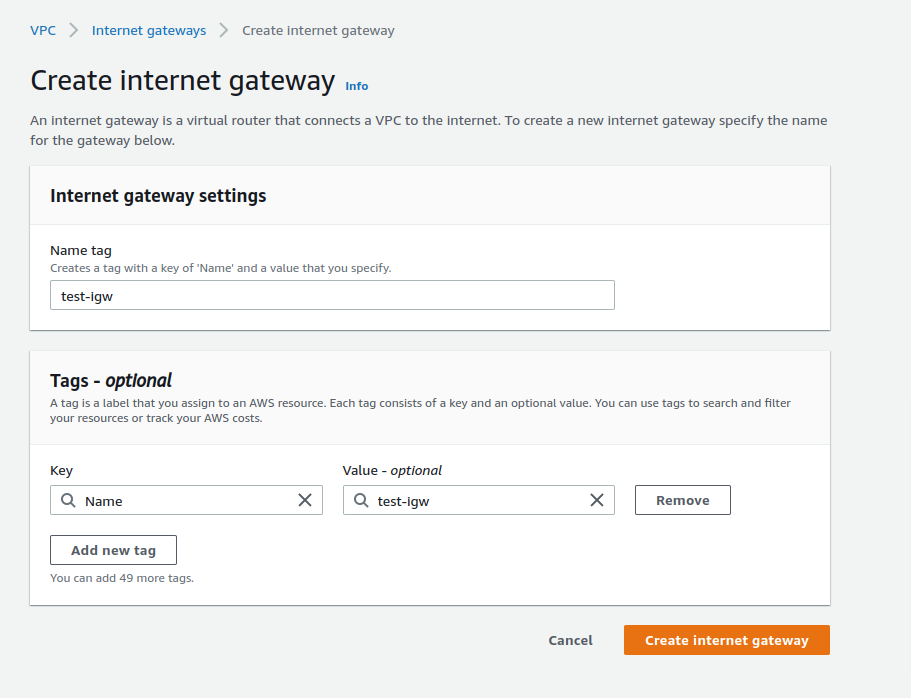
Add an Internet Gateway to the VPC.
Add Route Tables against the Subnets.
Associate the Internet Gateway with the Public subnet's Route Table.
Let's add a Intenet Gateway to your VPC.
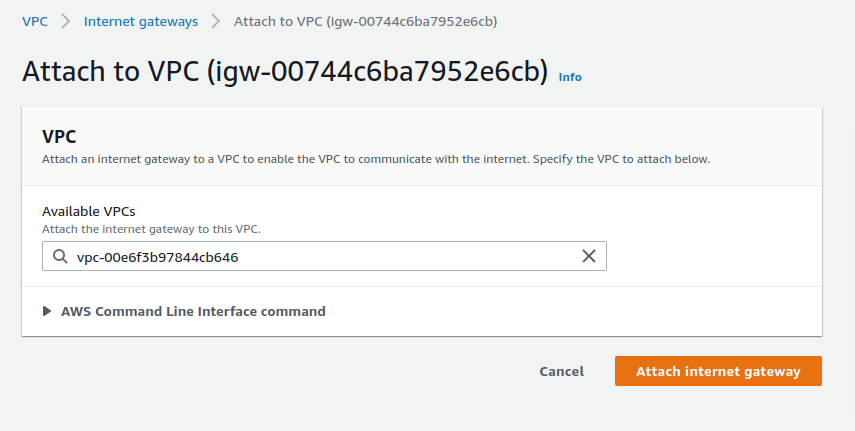
Now we need to associate this IGW with our VPC.
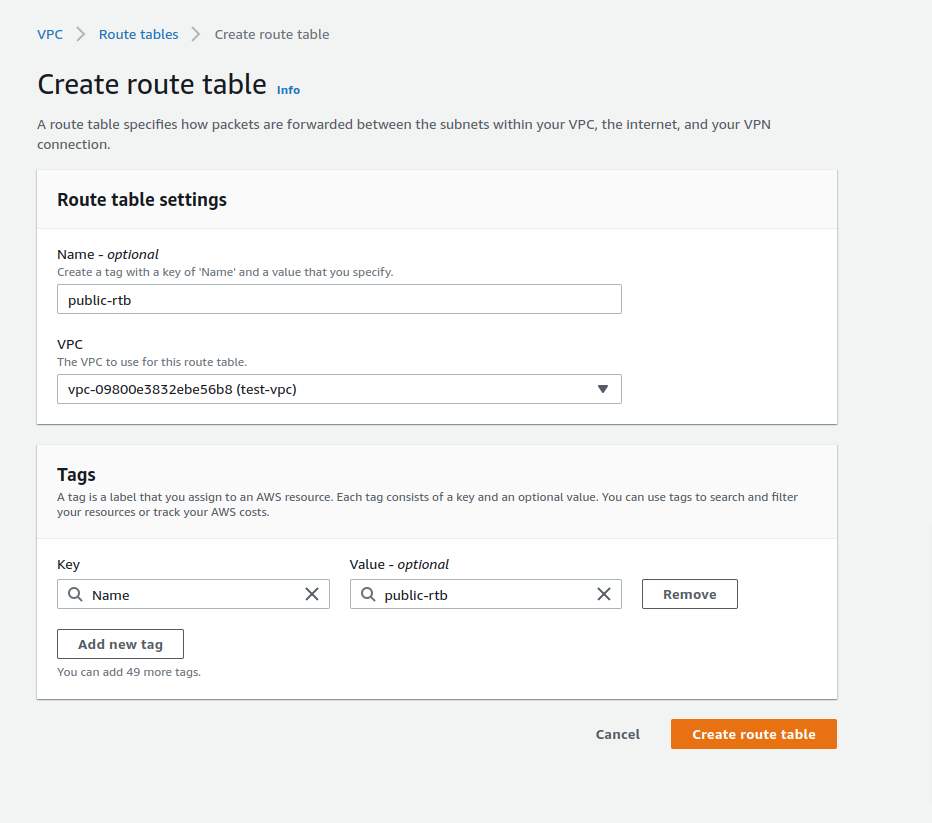
Let's create 2 Route tables called public-rtb and private-rtb aginst your VPC.
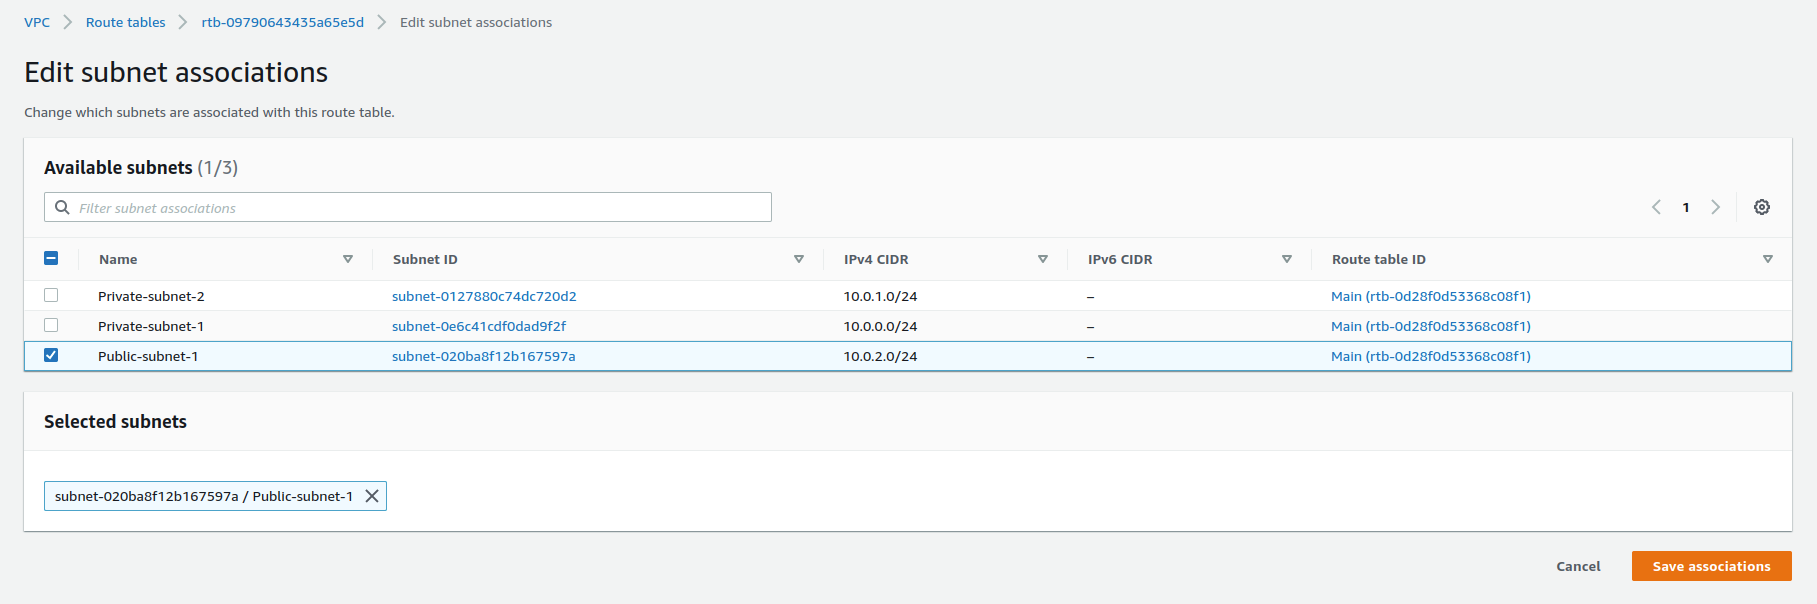
Let's associate the public-rtb with Public-subnet-1 and private-rtb with Private-subnet-1 and Private-subnet-2. You can select the Edit subnet associations menu in the Actions after selecting the paricular route table.
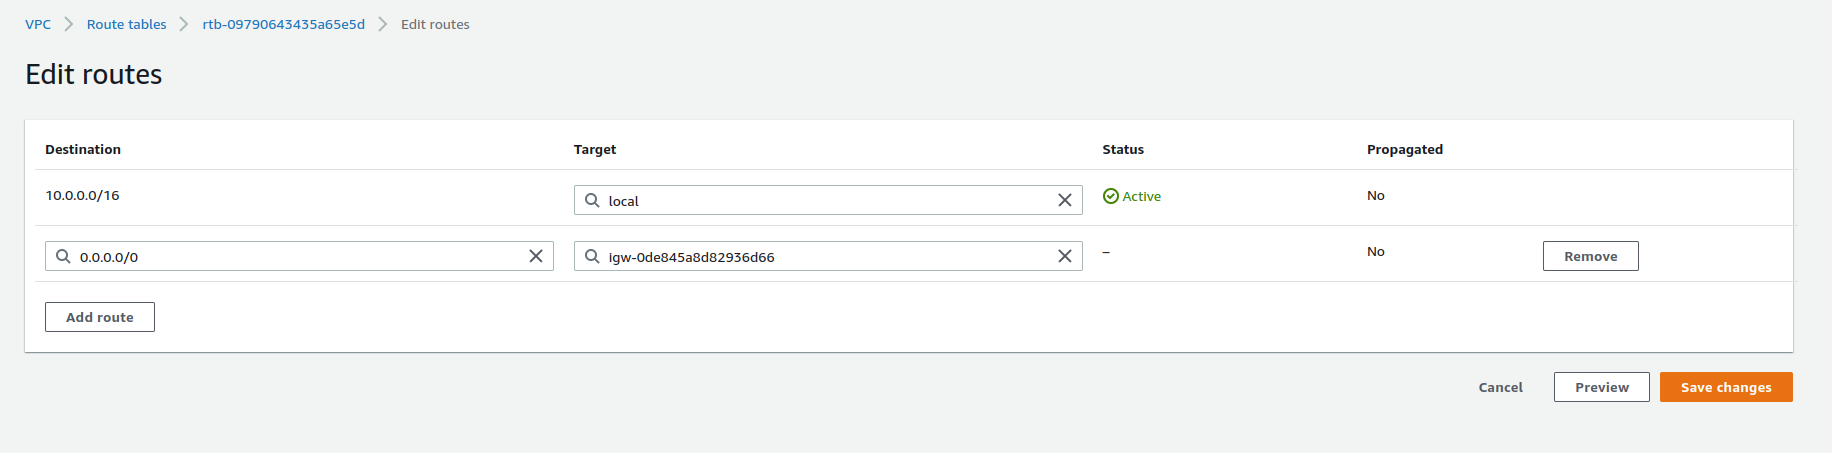
Now you need to select the Edit routes menu in the Actions after selecting the public-rtb route table. Then add 0.0.0.0/0(Anywhere) under Destination and for Target select the IGW you created.
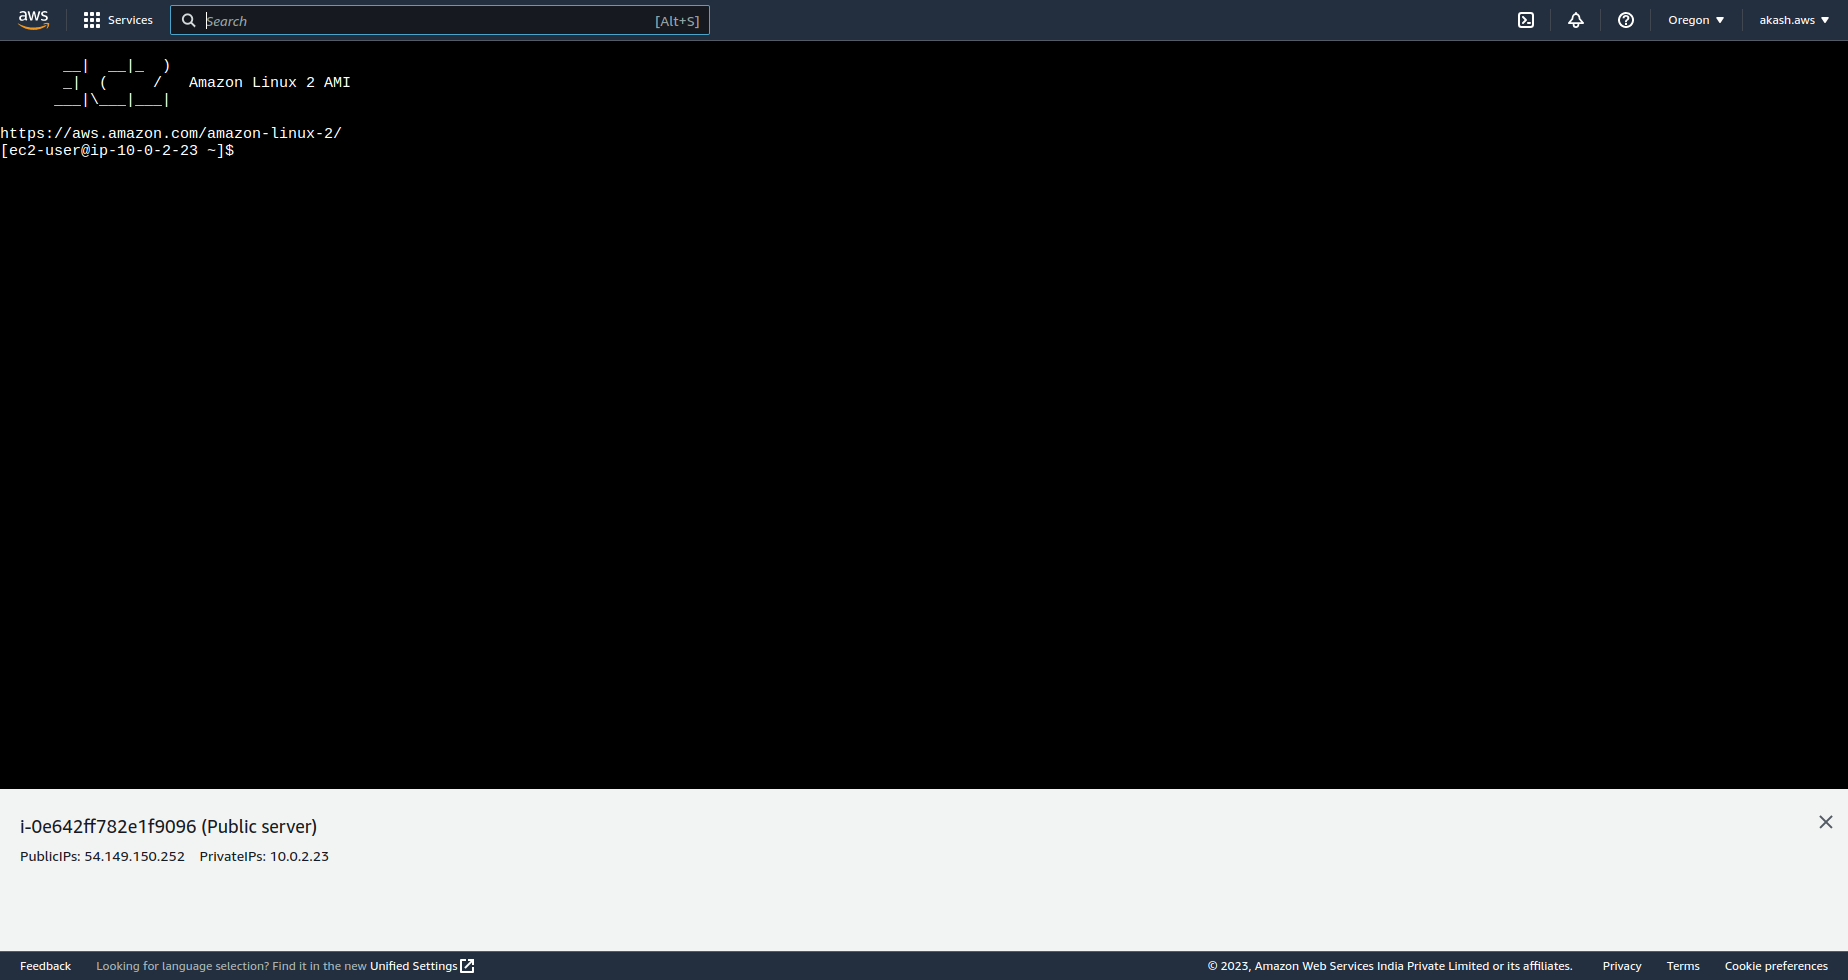
Now you should be able to connect to your EC2 instance located on Public-subnet-1.
Launch EC2 instance on Private Subnet
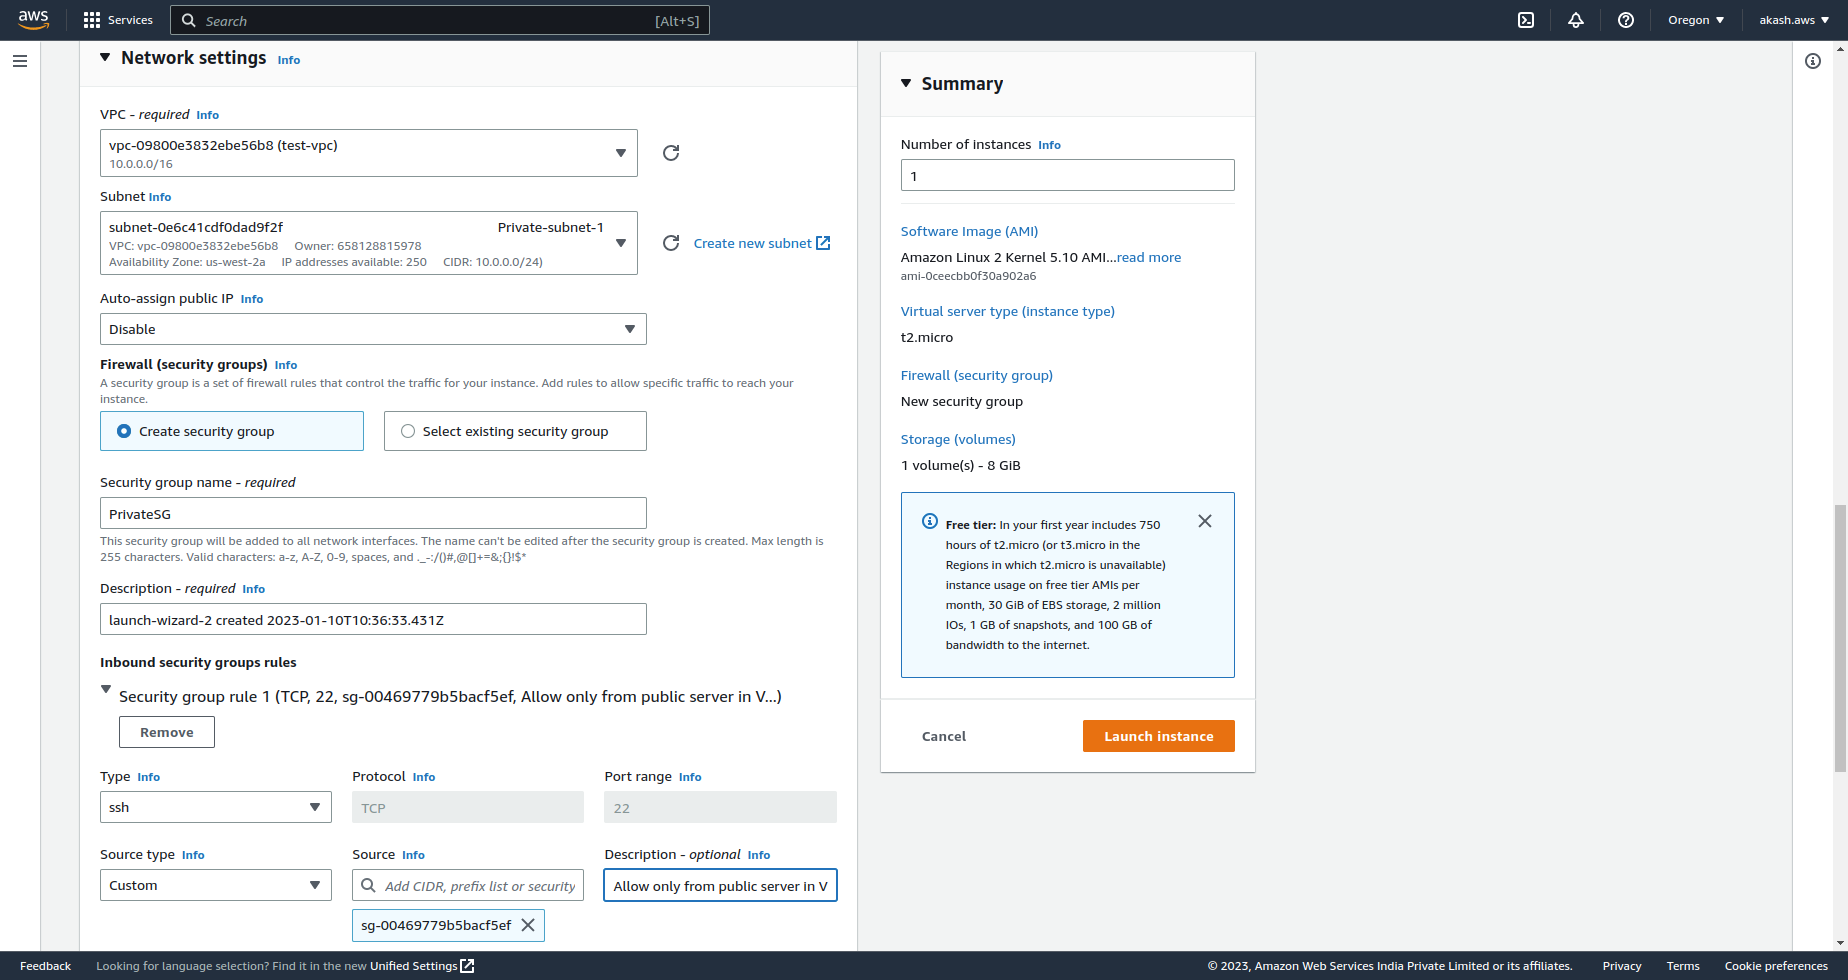
On our Private-subnet-1, we can launch an EC2 instance. In the Network settings we can select Disable under Auto-assign public IP since we will not be accessing this server outside the VPC.
Let's create a security group PrivateSG and under SSH rule we can add Source Type as Custom. Then we can add the Source as the Security Group of our Public server or Bastion Host. So this private instance can only be accessed through the public instance in the same VPC by SSH connection.
You should also generate a new .pem key when you're creating this instance.
Now if you want to access your private instance, you need to SSH into the bastion host and then add the .pem file inside that.
I have the .pem key details in my bastion host via vim editor by running this command. You can add the file in any way suitable for you.
vi private-subnet-key-pair.pem
Then add the content of the private subnet's key pair to it.
Then run this command, if necessary, to ensure your key is not publicly viewable.
chmod 400 private-subnet-key-pair.pem
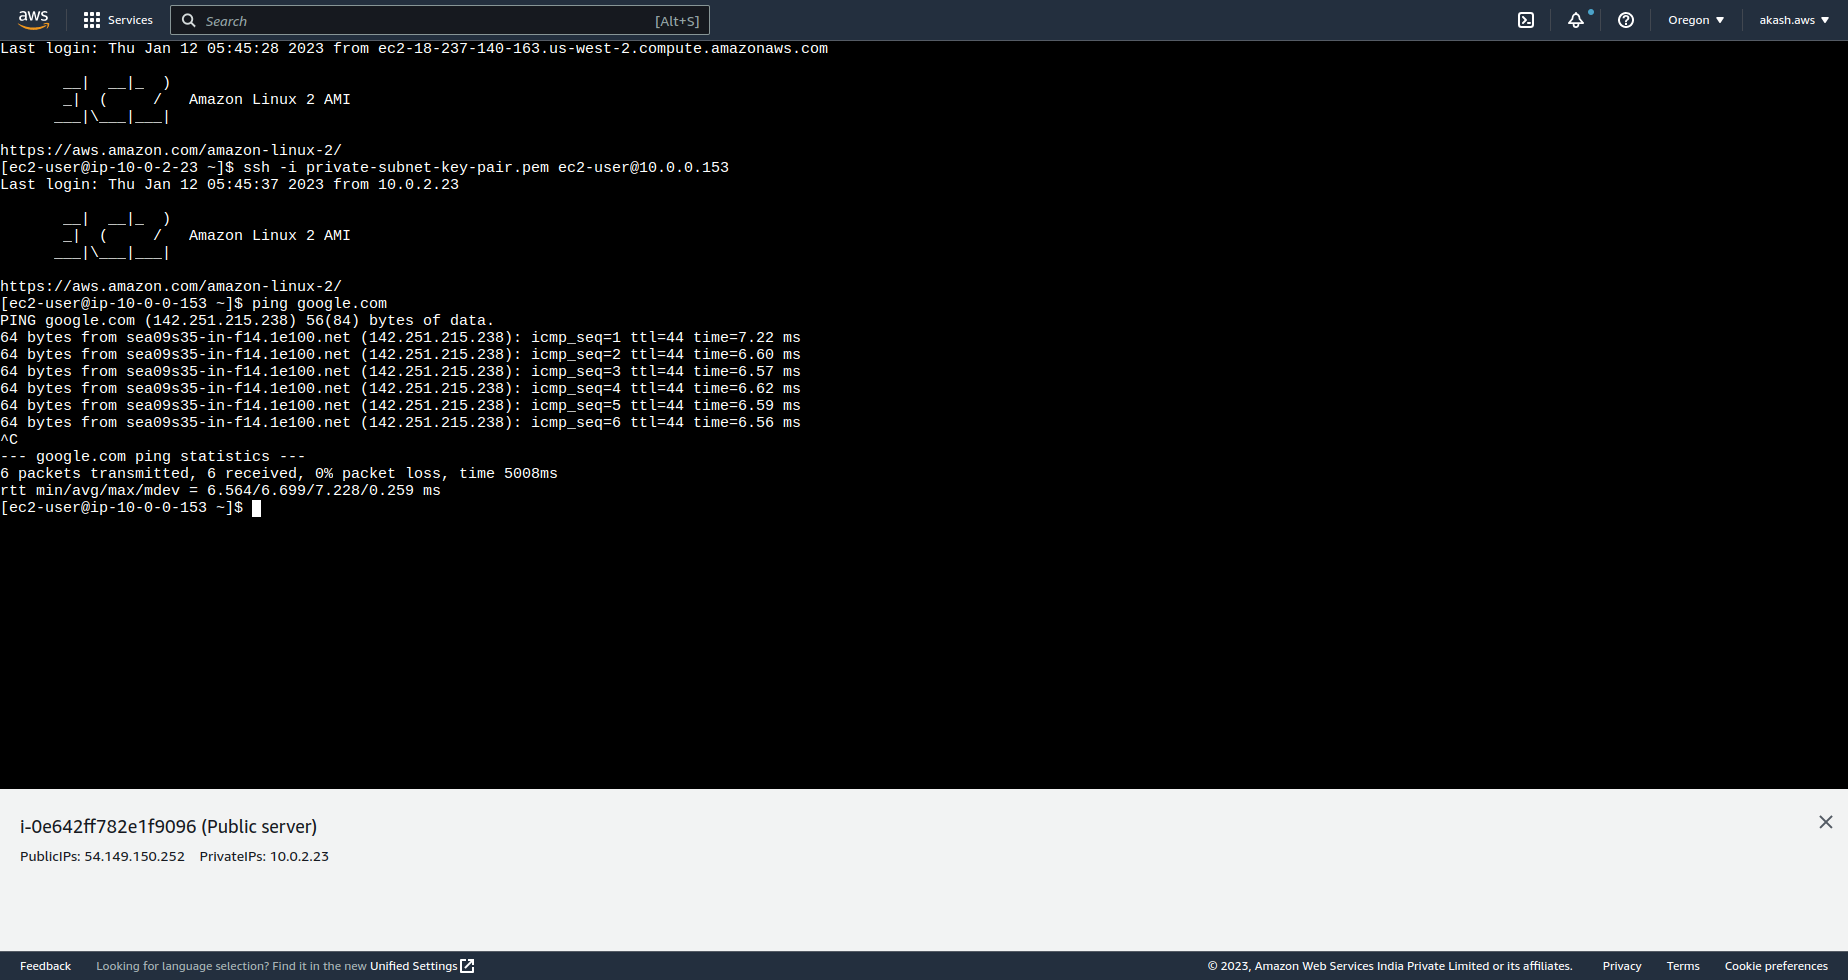
And then you should be able to connect via SSH to your private instance. For me, the command looks like this, where 10.0.0.153 is the private IPV4 address of your instance.
ssh -i private-subnet-key-pair.pem ec2-user@10.0.0.153
Now, you are accessing your private instance within VPC through Bastion host.
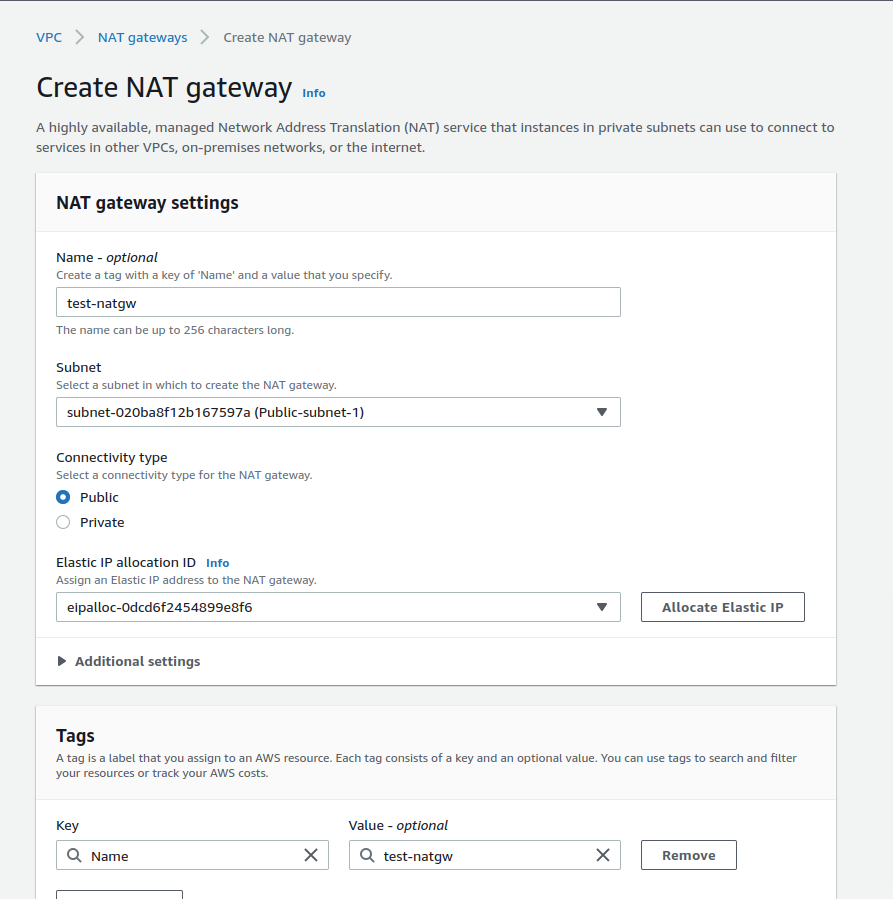
Create NAT Gateway
A NAT gateway is a Network Address Translation service. You can use a NAT gateway so that instances in a private subnet can connect to services outside your VPC but external services cannot initiate a connection with those instances.
Currently, our private EC2 instance will not be able to connect outside the VPC. To enable outside access from our private instance we need to implement a NAT gateway.
At first, we need to create a public NAT-Gateway in our Public-subnet-1, so this NAT-gw can access the internet.
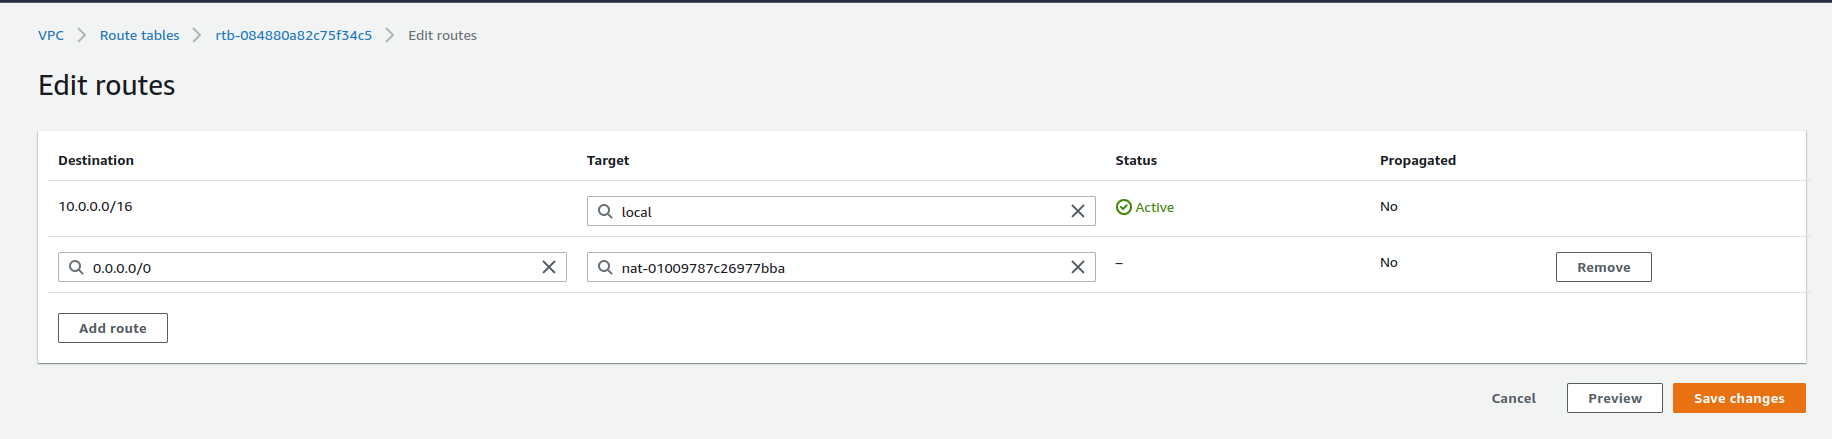
In the next step, we need to update our routes private-rtb by adding 0.0.0.0/0(Anywhere) under Destination and for Target select the NAT-GW you created.
Now, your private subnet has access to the internet. You can verify it by SSH into your private subnet via the public subnet and by running ping google.com command.
Conclusion
Voila! we're able to set up our first bastion server. We need to go through so many AWS infrastructure changes, which can be hard to digest all at once. You should try to get your hands dirty by creating a bastion server again to understand it better.
Please delete the VPC and all it's dependencies you created in AWS.
Happy Learning !!